Dan Dressler
  • Home
  • Memory On Display
  • My Work
    • Twilight Zone Series
    • Cell Phone Photo Memories
    • Home Decoration
    • Summer_2019
    • Beneath the Surface
    • Multi Media Collage
    • Photography
    • Mono Prints
  • Contact

Photography Assignments

Collaborative Film Shooting

12/5/2018

 
Goal: Working in a collaborative group, take turns shooting 35mm film with an SLR manual camera. Produce effective shots that address (1) composition, (2) proper exposure, (3) aperture priority & (4) shutter priority.

Directions:

1. Each roll of film contains 36 exposures.  Divide 36 by the number of students in the group to determine how many shots each student will take.
2. Students will carry a clipboard with them and document each shot taken.  A description of the subject matter, aperture and shutter speed combination should be documented. 
3. Students will be required to demonstrate a variety of techniques including: (1) Back lit Lighting, (2) Aperture Priority, and (3) Shutter Priority.  
4. Once the group film has been shot, the next step will be to load and process film.  Stay tuned for the next unit of instruction!!

Rubrics:
1. Student has successfully shot allocated film.
2. Students faithfully documented each shot taken on their clipboards.
3. Student has successfully shot mechanically sound negatives that are (1) properly exposed, (2) demonstrates aperture priority, (3) demonstrates shutter priority, (4) demonstrates back lit lighting.
  
Picture
Click here to download Photo Shooting Documentation Form
[Photo Doc Form]

Photo Restoration

5/24/2018

 
Goal:  Restore an archived photograph using the "Non Destructive" method.

Directions: 
  1. Download attached file and open in Photoshop.
  2. Image > Adjust > Auto Tones
  3. Image > Adjust > Levels
  4. Crop > Rule of 3rd
  5. Edit > Fill > Content Aware
  6. Spot Healing Brush and / Healing Brush
  7. Image > Mode > RGB
  8. Making New Layers
  9. Brush Tool / Controlling Size and/or Hardness
  10. Colorizing Image : Blending Mode > Color Burn
  11. Opacity Slider
  12. Hue & Saturation
  13. Layer > New Fill Layer (color is default foreground color unless otherwise specified)
  14. Image > Canvas Size
  15. Grouping Layers:  Layer > New Group from Layers
Picture
enatheballerina_2.jpg
File Size: 607 kb
File Type: jpg
Download File

Photo Slice!

4/6/2018

 
Picture
Objective: To slice up and alternate 2 copies of a photograph to create an elongated  doubling effect.

Directions:
  1. Create high resolution, original photos that convey energy, motion or the act of executing an action. Review photos and select one that you feel will be most appropriate for this project.
  2. Ensure that the image is an even dimension in inches.
Picture

Watertown Savings Bank Annual Calendar Contest

3/23/2017

 
High School Photo ContestWe distribute thousands of calendars each year to our customers.  For our 2018 calendar we are looking for twelve photographs that depict scenes of Watertown, Waltham, Newton, Belmont, Lexington or Arlington.  High School students who live or attend school in any of those towns are invited to submit up to three photos, either in black & white or color.  The winning photos will be displayed on the bank’s digital screens and will appear in the upcoming calendar.  Photographs must have been taken within the past two years (photos taken before March 2015 are not eligible).
Complete the form below and submit the form with your photos.  DEADLINE FOR ENTRIES is April 16, 2017
  • First Prize—$500 Amazon Gift Certificate
  • Second Prize—$300 Amazon Gift Certificate
  • Third Prize—$200 Amazon Gift Certificate
  • Nine Honorable Mentions— $100 Amazon Gift Certificates
Winners will be notified by mail and will be invited to attend a special awards event to celebrate their efforts.

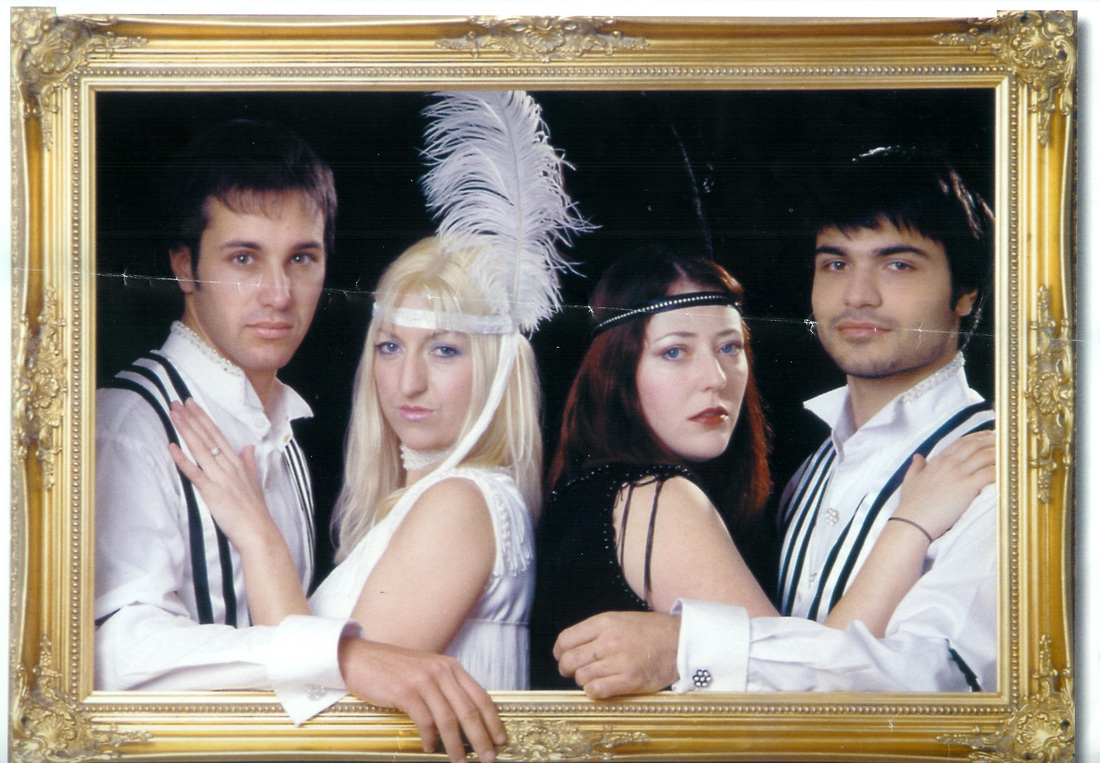
[See Full Web Site for more detailed information]

​


Photo Repair /Maintenance

12/1/2016

 
Project Goal: Addressing the photos provided, touch up and repair photos with Adobe Photoshop.

Directions:
  • Download all four photos posted above to your student folder.
  • Using the tools listed below, repiar photos and attempt to make them look new again.
Rubrics:
  • Media Literacy: Demonstrate understanding of (1) layer pallet, (2) Curves, (2) Clone Stamp Tool, (3) Healing Brush, (4)& Painting Tools
  • Use tools in Adobe Photohop to effectively repair and recover digital photos to their original luster.
  • Photoshop Tools
  • Clone Stamp
  • Curves
  • Layers
  • Painting Tools
  • Healing Brush

Dodging & Burning

12/1/2016

 
Picture
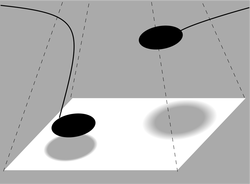
Dodging and burning are terms used in photography for a technique used during the printing process to manipulate the exposure of a selected area(s) on a photographic print, deviating from the rest of the image's exposure. In a darkroom print from a film negative, dodging decreases the exposure for areas of the print that the photographer wishes to be lighter, while burning increases the exposure to areas of the print that should be darker.[1]
Project Goal: Create several prints in the darkroom by combining several unrelated subject matter into a single expression.  Combine negatives, digital print outs and found materials.  Utilize the dodging and burning technique to blend unrelated images, creating smooth transitions.


Analog Double Exposure Photographs by Florian Imgrund
http://www.thisiscolossal.com/2012/03/double-exposure-photographs-by-florian-imgrund/
http://andredefreitas.com/Double-Exposures
http://www.jonduenas.com/double-exposures#1
http://abduzeedo.com/double-exposure-photography-yaser-almajed

Light & Shadow

11/30/2016

 
Objective: Create a series of photography works that deal with light & shadow.

Kumi Yamashita

Steve McCurry

Directions: Explore your surroundings while considering the application of shadows.  For outdoor shooting, time of day is important.  Early morning and/or early evening will produce the strongest shadows. 

Consider how shadows impact architecture, people, nature, etc...  Observe how shadows can create textures: Chain link fence, fabrics, window frames, etc.

Consider back lit subject and silhouettes!

Student Portfolios

11/28/2016

 
Project Goal:  Design an online web-based portfolio of your photography work. Create a philosophy statement. Color manage, down-sample and upload photography work to your web site.


Web Portfolio Example: http://flashman2000.wix.com/dresslerportfolio

Directions:  Go to www.wix.com and create a free account.  Work off of a pre-existing wix template or design one from scratch.  Create a navigation bar for your project work.  Upload project work (*see directions on color managing down-sampling project work). Create an artist statement about yourself.  Publish site!

The following projects are required to be on your final portfolio site:  (More project work to be announced).  Each individual project should be linked to a separate page.  Homework images can be linked to a single page. 
  1. Digital Collage (1 image)
  2. Pleasantville Project (3 images)
  3. Portrait Overlay (6 images)
  4. Photo Splice (2 images)
  5. Tryptich (3 images)
  6. Photo Restoration (6 images)
  7. Field Trip Images (21 images)
  8. More TBA
Down Sampling: Control File Size and Format
Before uploading work to your Wix web site, check the (1) file size & (2) resolution.  The average graphics file size on the web is 200k - 1.5mb.  


1000 kilobytes (k) = 1 megabytes (mb)
Check the image information with Adobe Photoshop:
After opening the image in Photoshop Go Image > Image Size
Here you will see a section called document size.  Establish your width, height and resolution. Typical file sizes are 6x8, 8x10, 8.5x11, 12x17.  Resolution should be set at 72dpi.  
*Make sure the Constrain Proportions' box is checked before changing file size. Click OK when finished.  Go File > Save As.  
Save file using .JPG format. 

Create a new folder on your computer called Web Images.  Save your formatted images into this folder.  Consider relevant file names for better organization.  Example: plesantville_1.jpg, plesantvill_2.jpg, etc...


Picture

Color Management: Control Value and Contrast

Photoshop Keyboard shortcuts: Hold down the Command & L key down at the same time for the levels window.  Slide the black & white pointers across the histogram to optimize value and contrast.

Picture
Color Management: Hue & Saturation

Hold down the Command & U key to access the Hue & Saturation menu.  Here you can isolate individual channels of color and saturate or desaturate color.  


Picture
Rubrics:
  • All Project work listed above has been posted on your wix web site.
  • 10 Portrait Overlay study to be included as part of portfolio requirement and studio grade assessment *.
  • Categories of work have been neatly displayed within individual pages/galleries.
  • All photos have been color managed through Adobe Photoshop and resized and formatted when required.  *See directions above on color management and downsampling.

Mount Auburn Field Trip

11/28/2016

 
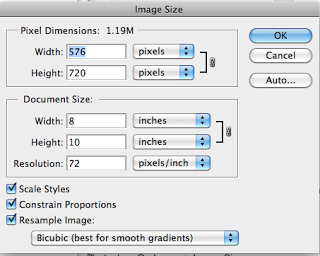
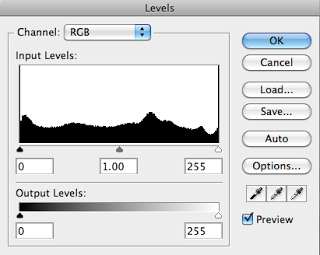
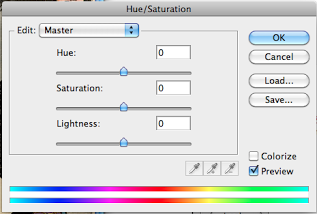
Mount Auburn Cemetery


Field Trip Objective: On site photo shooting assignment.  Explore Mount Auburn Cemetery and shoot a variety of photos that addresses composition.  Consider the guidelines to composition: (1) Rule of Thirds, (2) Simple Backgrounds, (3) Resolved Focal Points, (4) Framing, (5) Angles /  Lines (6) (7)

Bring the photos back to the classroom and upload to your computer.  Edit and color manage photos with Adobe Photoshop.  Experiment with Levles to adjust value/contrast (Command + L). Experiment with Hue and Saturation to adjust color balance (Command + U). Use the rulers in Photoshop as reference to straighten archetectural lines, rotate and crop.  Use the blur filter to create variations of depth of field within photo ( In Photoshop go Filter > Blur >Lens Bliur.

After managing photos with Photoshop upload 10 or more photos that represent Mount Auburn and 10 or more that represent Harvard Square to your Google Classroom account under the heading "Field Trip".  


Photo Samples by Photography Students:

Photo Samples by Dan Dressler:

Forced Perspective

11/28/2016

 
Forced Perspective!

Project Goal: Create a series of photographic illusions thats plays upon perspective trickery!  See examples below and be inspired with your own originality. Consider the use of props or natural elements found in nature.  For this project, its more about the way you align information and compose your photos.  Less about photoshop manipulation.  

Directions: Create 8 original forced perspectives. Four in school and four outside of school.  Consider using props for this project.  Use Photoshop to color manage and format photos.  We will not be cutting and pasting collaged information.  Instead, compose your subject matter and align so as to establish the forced perspective illusion.  


Rubrics:
1. Complete 8 original studies. Four in school and four outside of school.
2. Studies successfully create the illusion of forced perspective. 
3. Each study demonstrates original thinking.
4. Studies involves props. 
5. Works are high resolution, color managed and cleaned up for final presentations. 
Forced perspective is a technique which employs optical illusion to make an object appear farther away, closer, larger or smaller than it actually is. It manipulates human visual perception through the use of scaled objects and the correlation between them and the vantage point of the spectator or camera.
Picture
<<Previous

Visual Art by Dan dressler

Contact Information

Dan R. Dressler
​Waltham, MA 02453
visualart@dandressler.com
  • Home
  • Memory On Display
  • My Work
    • Twilight Zone Series
    • Cell Phone Photo Memories
    • Home Decoration
    • Summer_2019
    • Beneath the Surface
    • Multi Media Collage
    • Photography
    • Mono Prints
  • Contact