Dan Dressler
  • Home
  • Memory On Display
  • My Work
    • Twilight Zone Series
    • Cell Phone Photo Memories
    • Home Decoration
    • Summer_2019
    • Beneath the Surface
    • Multi Media Collage
    • Photography
    • Mono Prints
  • Contact

Photography Assignments

Light Painting

11/23/2016

 
  • http://www.michaelbosanko.com/
  • http://lightpaintingphotography.com/light-painting-artist/featured-artist-2/janne-parviainen/
  • http://viralgecko.com/stunning-shadow-photography-by-alexey-bednij/
  • https://www.youtube.com/watch?v=RAe30VG5CI4
  • http://www.smashingmagazine.com/2009/03/01/showcase-of-beautiful-shadow-photography/
  • http://petapixel.com/2011/04/01/giant-spheres-created-with-light-painting/

Photograms

8/27/2016

 
Picture
Photogram: a picture produced with photographic materials, such as light-sensitive paper, but without a camera.

The first artist to exhibit Photograms was a Surrealist named Man Ray.
​

Directions: (part a)
  1. Place random found objects over a sheet of light sensitive photo paper. Arrange images to create a pleasing asymmetrical composition. Use a variety of found objects that vary in transparencies.
  2. Process image chemically and hang to dry. 
Rubrics:
  1. Composition: Create asymmetrical compositions. 
  2. Create imagery that demonstrates ranges of tonality.
​

Objective:  Create photograms with original digital printed collages (rather than using found objects).

Directions: (part b)
  1. Create a digital collage. (a) In Photoshop go Image > Adjustment > Threshold.   (b) Edit > Transform > Flip Horizontally  (c) Image > Adjustment >   Invert.      
  2. Print out image in black & white.  
  3. Place printed image face down on top of photo sensitive paper.  Expose light over the photo paper/printed image for approximatley 7 to 10 seconds.  
  4. Chemically process print(s) with photo chemicals, hang and dry.

Picture

Triptych Photography

8/27/2016

 
Picture
Picture

Directions
  • Create 3 Panoramic Triptych Images; horizontally and/or vertical
  • Stage an event with people. Create a narrative. Hilliard talks about the social and physical distance between the group verses the individual. 
  • Shoot multiple photos. Explore a variety of environments. 
  • Experiment with plane and focal shifts.
  • Create photographic experiences that embodies David Hilliard's style

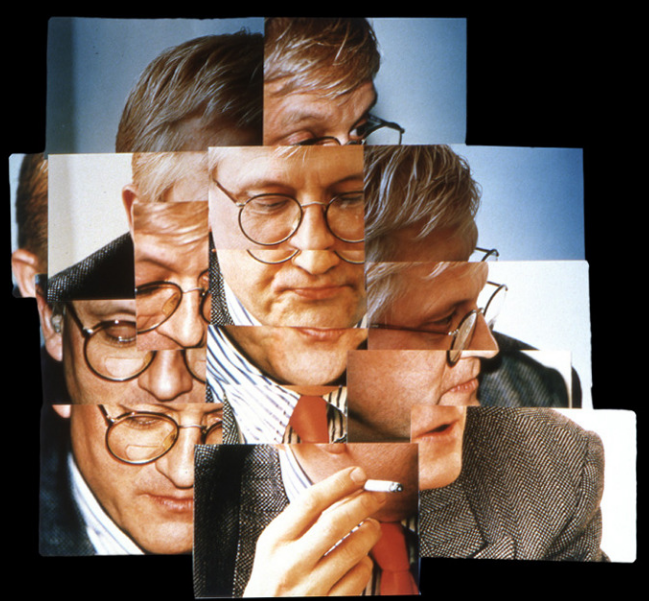
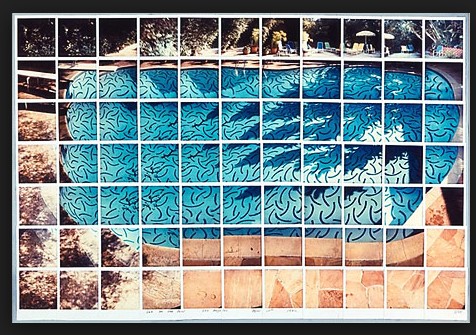
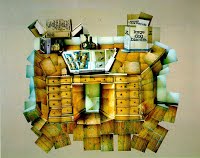
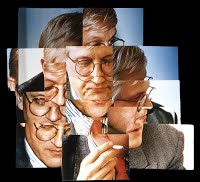
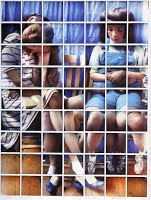
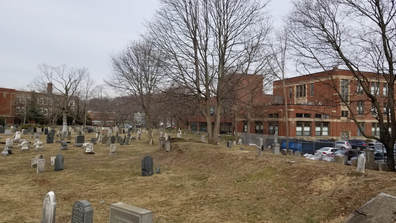
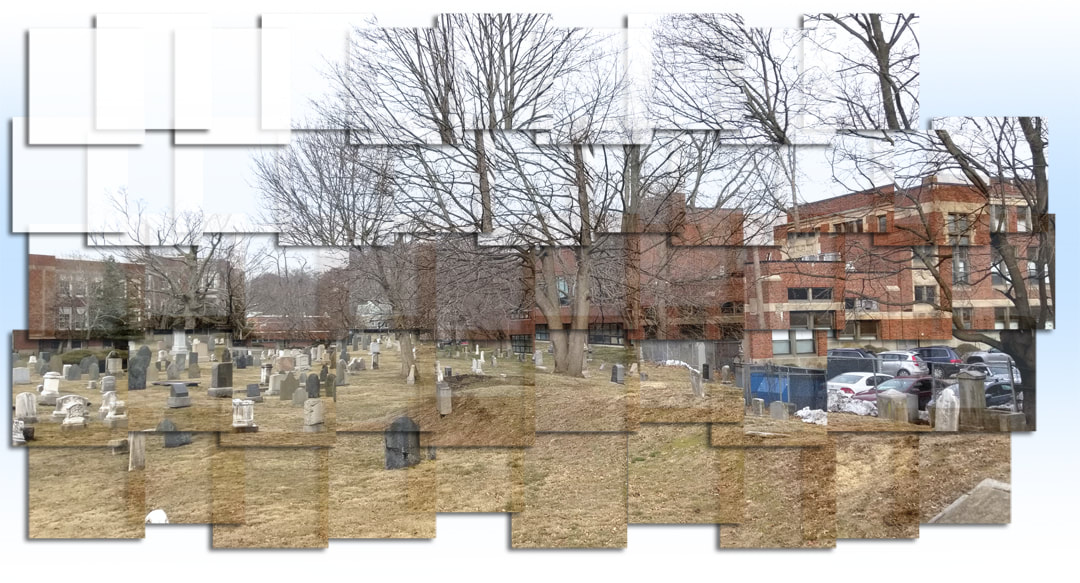
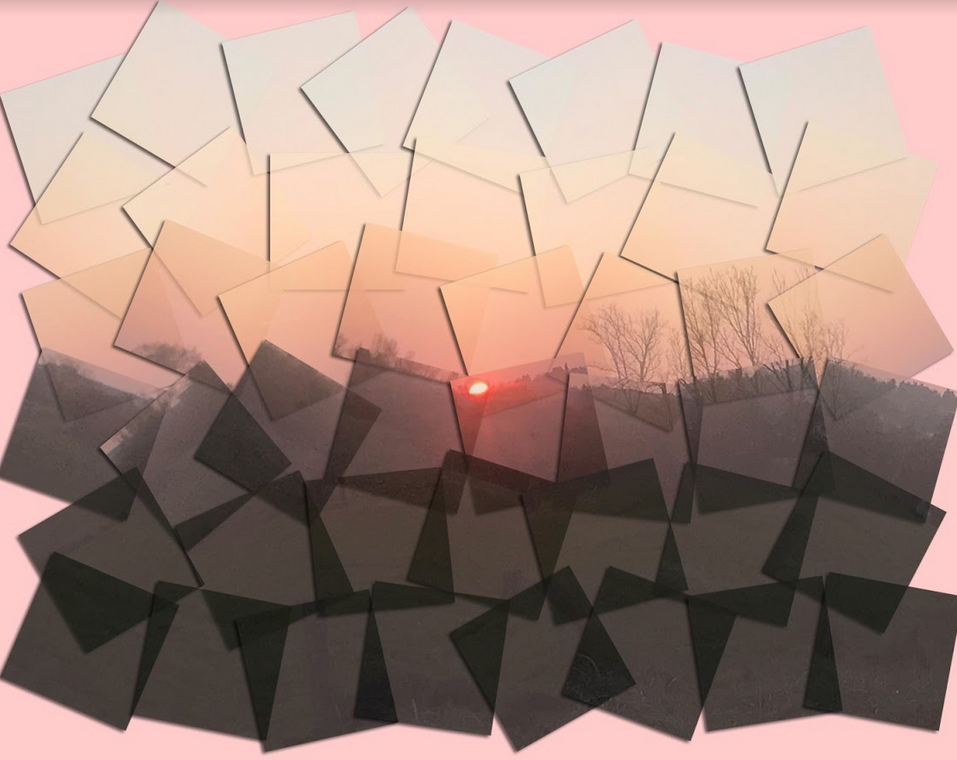
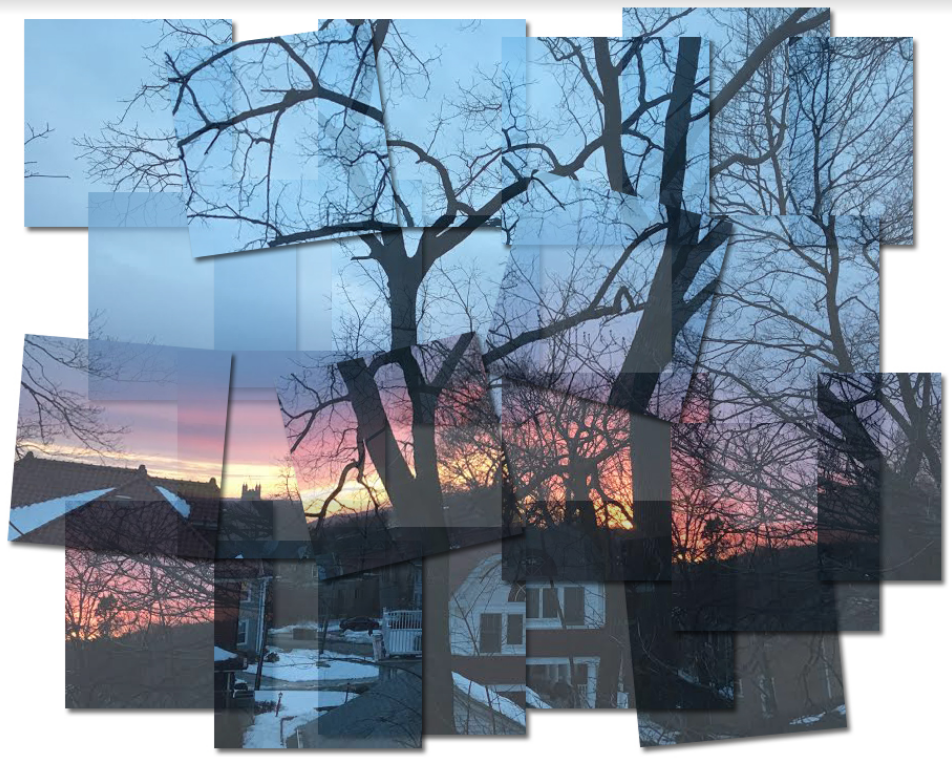
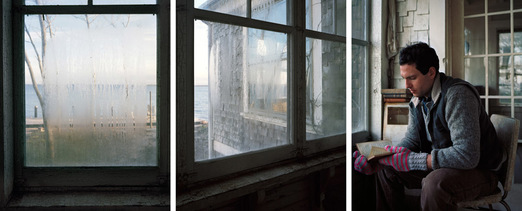
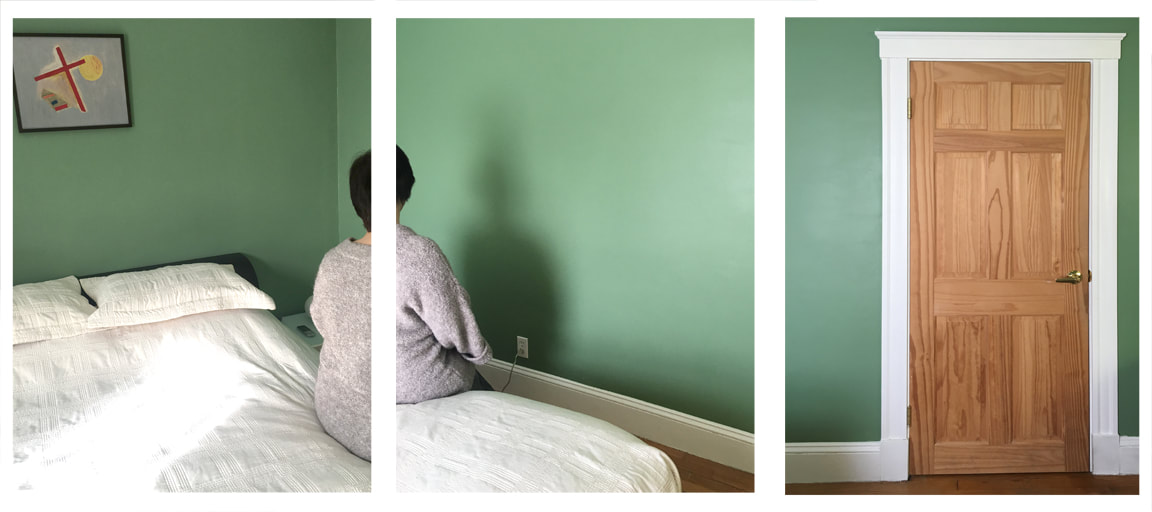
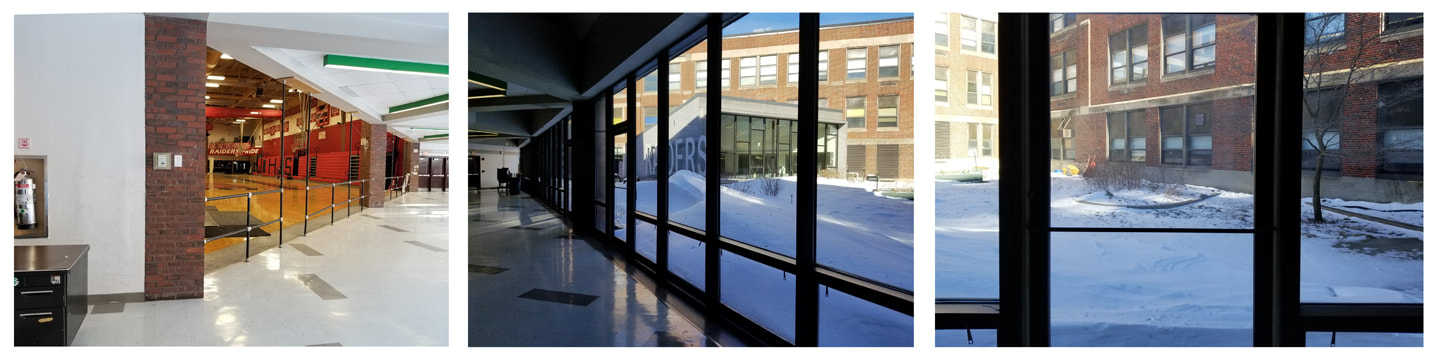
About Statement


For years I have been actively documenting my life and the lives of those around me, recording events and attempting to create order in a sometimes chaotic world. While my photographs focus on the personal, the familiar and the simply ordinary, the work strikes a balance between autobiography and fiction. Within the photographs physical distance is often manipulated to represent emotional distance. The casual glances people share can take on a deeper significance, and what initially appears subjective and intimate is quite often a commentary on the larger contours of life.

For me, the construction of panoramic photographs, comprised of various single images, acts as a visual language. Focal planes shift, panel by panel. This sequencing of photographs and shifting of focal planes allows me the luxury of guiding the viewer across the photograph, directing their eye; an effect which could not be achieved through a single image.

I continually aspire to represent the spaces we inhabit, relationships we create, and the objects with which we surround ourselves. I hope the messages the photographs deliver speak to the personal as well as the universal experience. I find the enduring power and the sheer ability of a photograph to express a thought, a moment, or an idea, to be the most powerful expression of myself, both as an artist, and as an individual.


David Hilliard
​
Rubric:
  1. 3 separate connecting frames that create a panoramic scene. 
  2. Create Focal shifts between frames
  3. Incorporate people into photography to create social narratives (Social and Physical distances between individuals and/or groups of people)
  4. Variations of depth of field between frames.  

Picture
Picture
Picture

Photoshop Filters (Interpreting Photographic Information)

8/27/2016

 
Picture
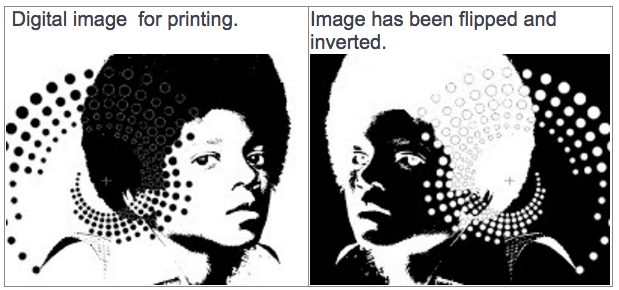
Alex Williamson is a London based Graphic Artist and Commercial Illustrator who also works in Moving Image and Graphic Design. Alex creates original artwork using cut-out, collage and print techniques, combining found ephemera, drawing and photography. Alexs work has been featured in several international publications and he exhibits regularly.

Start this project by making a new document in photoshop. This document should be Tabloid format. Either portrait or landscape. Resolution should be 150dpi or higher, depending on the resolution of your digital photos. Convert your digital photos into flatter, graphic expressions. For example, in Photoshop you can:
  • Posturize (image / adjustments / posturize)
  • Convert into silhouette (select outer contour of image and fill with color)
  • Explore Filters (such as Filter / Artistic / Half Tone Print)
Produce an original composition using images of people, graphic shapes, primary colors, typography and clip art.

Three Print Analog Project

8/27/2016

 
Create 3 Analog prints based on the Photographic Standards that were recently discussed in class from the book "Photographic Eye, Chapter 4 - Developing a Critical Eye - pg. 67". It is expected that you will produce multiple prints throughout the duration of this course. Based on the photographic standards you will choose your 3 best prints for submission.

To complete this project you must successfully shoot 1-2 rolls of film and use your original negatives in the darkroom. Until you have your own negatives to work with, archived negatives will be supplied to you for practice. You will not be permitted to submit prints that were produced with negatives other than your own. 

These standards include:
  • Value - Range of Tonality from pure white, grays & pure black
  • Clarity - Range of intentional focus (depth of field & or motion)
  • Composition - Arrangement of visual information (see Kodak Guide to better Composition)
  • Presentation - Even borders, no scratches, chemical stains, finger prints, uneven chemical processing, etc...
  • Aesthetics - Developing a personal style that is unique to your approach to photography.

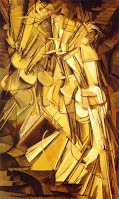
[Three Print Evaluation Form - pdf]

Surrealism

8/27/2016

 
Surrealism: a 20th-century avant-garde movement in art and literature that sought to release the creative potential of the unconscious mind, for example by the irrational juxtaposition of images.
Picture
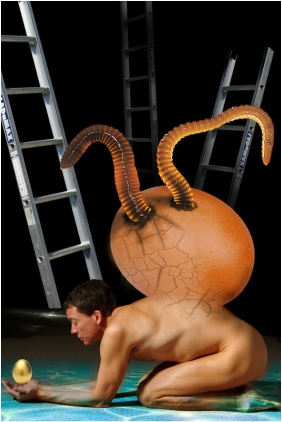
Objective: Create an original surrealistic photograph.  

Directions: 
  1. Research surrealism and surreal photographs on the internet.
  2. Evolve a concept for this project. 
  3. Create original photographs. Shoot photos at the highest resolution that your camera will support. Sample additional imagery off of the internet if needed.  However the main focal points of the photo should be created by your own camera.
  4. Use Adobe Photoshop to manipulate imagery to create photographic illusions that look real.
  5. Once you have completed this project, upload your work to the Photography Google Sites Classroom. 
Tools in Photoshop to Consider:
  1. Clone / Stamp Tool
  2. Dodging & Burning Tool
  3. Smudge / Blur Tool
  4. Working with Filters
Project Rubrics:
  1. Project conveys the principles of Surrealism. Randomly alternating the context of reality to create new visual relationships. 
  2. Photograph should look realistic. Evidence of blending light and shadow with various photoshop tools (Clone Tool, Blur Tool, Etc...) 
  3. Project should be based primarily on your own original photographs.
  4. Evidence of craft. Images are cleanly selected. Colors and values are adjusted to promote rich tones and proper contrast. 

Sequencing

8/27/2016

 
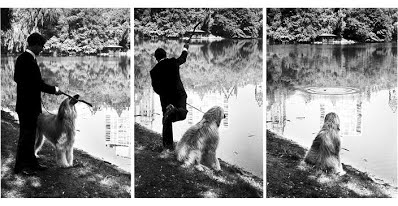
Elliott Erwitt on the art of photographic sequencing
http://www.bbc.com/news/magazine-17295728

http://lizcagephotography.blogspot.com/2012/03/sequencing-research-julie-cassels.html
Picture
Picture
Picture
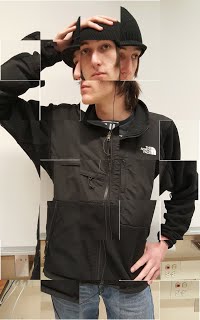
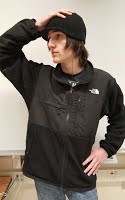
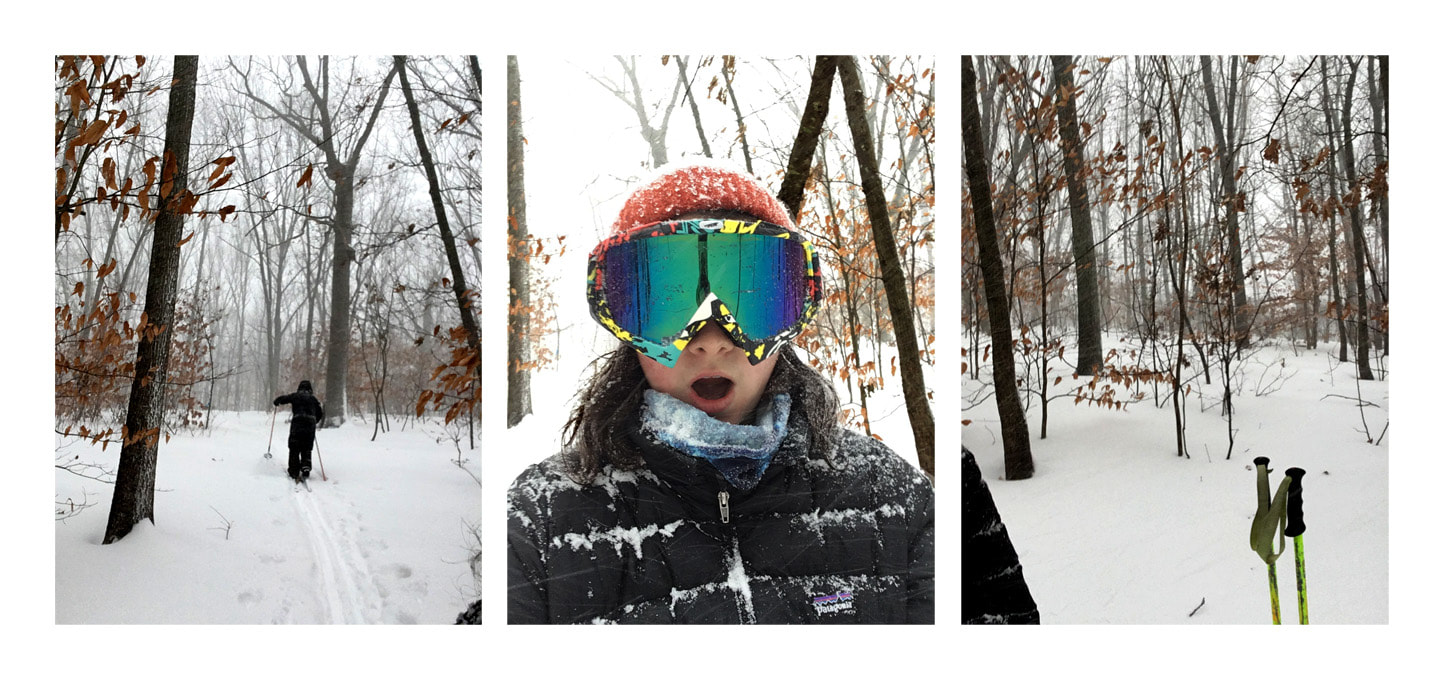
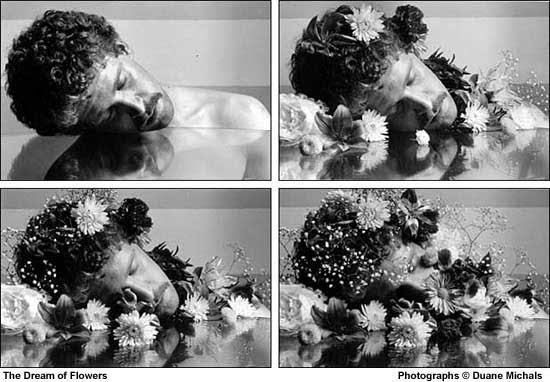
Objective: Research artists who use sequencing themes within their work. 
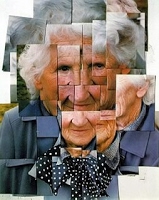
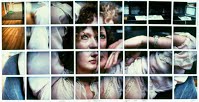
Create 3 triptych photographs that deal with the notion of sequencing. 

Directions: Outside of class create a series of photographs that deal with the idea of sequencing images.  These images combined will suggest a narrative, not unlike frames in a comic book.  Research one or more artists that deal with sequencing.  Be creative with your ideas.  Explore the possibilities!
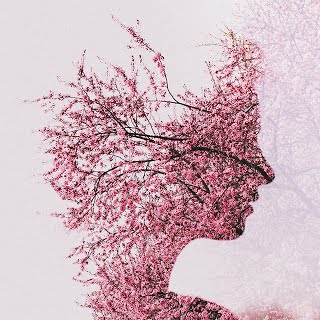
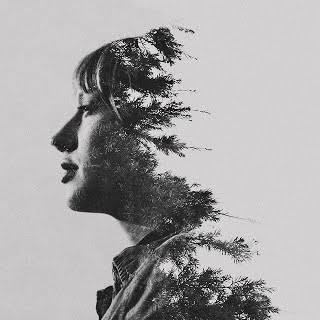
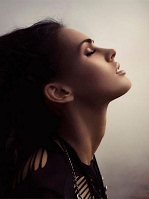
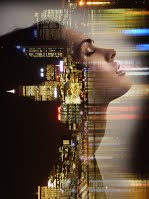
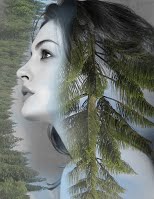
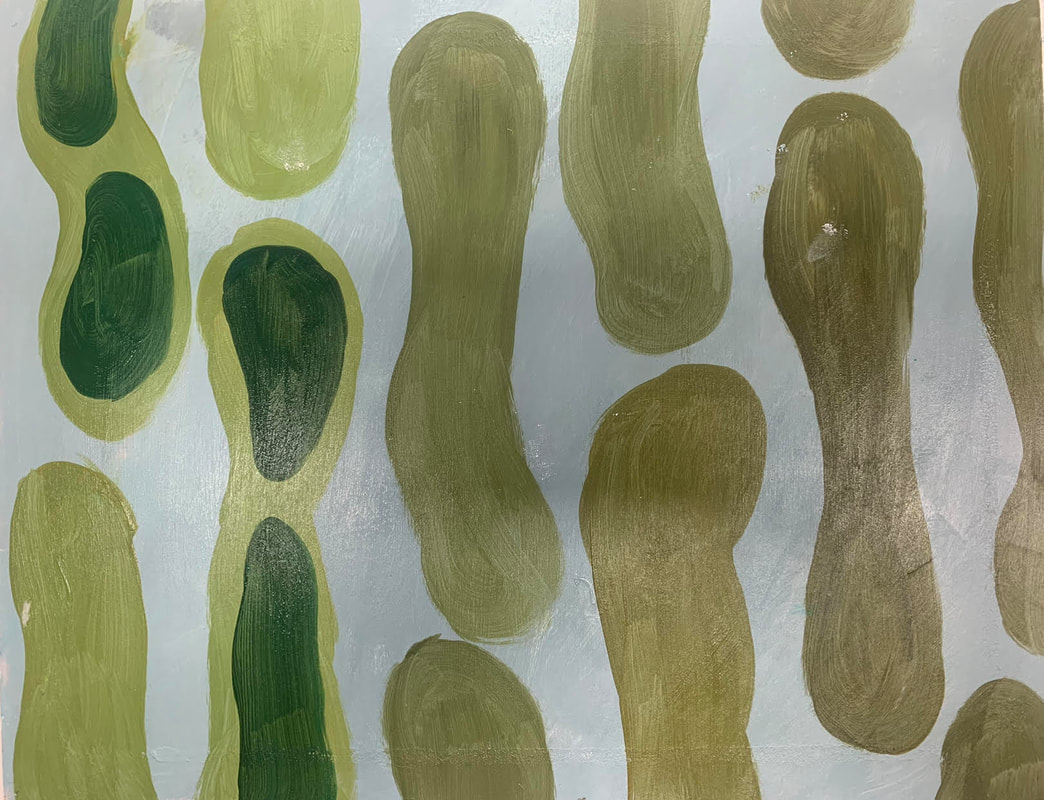
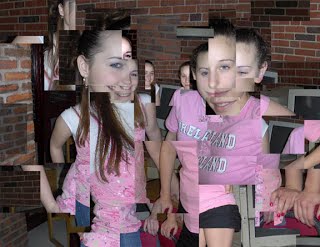
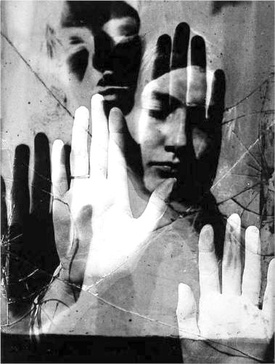
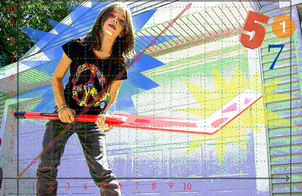
  1. Create 3 separate sets of triptychs.  Each set should address a unique subject.
  2. Shoot Photos at the highest resolution that your camera will support.  Some of these projects may be printed.
  3. Import images into Photoshop.  Color manage, crop, etc... your images.  
  4. Each image should be in a frame of equal dimension and resolution.  Ideal resolution should be 150dpi or  higher.

Portrait Overlay

7/1/2016

 
Work by Sarah Bryant
Study by Dan Dressler


​Goal
: Overlay digital portraits with unrelated subject matter, generating contrast with surface texture, value and color. Consider the interplay of positive and negative relationships. Consider the interplay of light as individual layers vary in transparency.  

Double Exposure Portraits by Sara K Bryne
http://www.thisiscolossal.com/tags/multiple-exposures/

Directions: (1) Produce a series of digital photographs of portraits (both side and frontal).  (2) Produce a series of unrelated imagery such as vegetation, trees, architecture, industrial, etc.  * Photos should be shot at the highest resolution that your digital camera will support.

Using Adobe Photoshop, import original digital photographs of  portrait & unrelated subject matter.  Use selection tools to create an outline of the portrait. Invert the selection tool to work on the background.  Use the eraser and blending modes to integrate unrelated information into portrait image.  Consider composition, interplay of positive & negative forms and background relationships.

Rubric:
Media Literacy:  Demonstrate understanding of a variety of tools found in Adobe Photoshop: (1) Layer Pallet, (2) Selection Tools & (3) Blending Modes.

Digital Photographs: Producing original digital photographs that showcase clear closeup side and frontal portraits as well as a variety of unrelated subject matter that contrasts the surface texture of the portrait. ( *See class demo and works by Sara Bryne via links above for examples)

Originality:  Produce a minimum of 10 overlay portrait studies.  Your final collection of work should reflect creative original thinking. and a range of applied Photoshop solutions. 

Composition: Final studies should demonstrate effective use of applied composition so as to create dynamic visual relationships between foreground and background layers.  

Framework Standards:

Methods, Materials, and Techniques
Students will demonstrate knowledge of the methods, materials, and
techniques unique to the visual arts.

Elements and Principles of Design
Students will demonstrate knowledge of the 
elements and principles of design.

Observation, Abstraction, Invention, and Expression
Students will demonstrate their powers of observation, abstraction,
invention, and expression in a variety of media, materials, and
techniques.

Photomontage

7/1/2016

 
template.psd
File Size: 514 kb
File Type: psd
Download File

Picture
Picture
Directions: Part 2

Step One: Download Template and open in Photoshop. 
Step Two: For each image that you shot and are using for this project, drag separately into the template that you downloaded and save individually as .psd files.  (1.psd, 2.psd, 3.psd, etc...)
Step Three: Keep one copy of the original template blank. Save this file as mastertemplate.psd.
Step Four: Open up all of the files at once and spread across the desktop.  Use the square selection tool to grab selections from the images that have the grid imposed over it.  Drag grid size squares randomly from your photos to the master template until the entire grid is filled on the master template.

*Keep in mind that the master template is 150dpi.  That means that you may have to resize your photos to conform to that of the template once you drag inside.  If you need to resize your photos go Image > Image Size > Scale 

Project Goal: Create 2 photomontages by combining multiple images of the same image from different angles into a single visual expression. One study will be based on the grid system, creating consistant shapes and spacing.  The second study will be more random with various size shapes, angles, overlapping forms and deconstructed borders
​
Directions: Part 1
  1. Using people and/or objects as subject matter, shoot a variety of images that subtly reveals slight changes in angles and body movements.
  2. Using the template provided, insert selected areas from multiple photos into the template grid.  The result should be a single expression  that conveys several body movements. Each section should be consistant in size like tiles on a wall.
  3. The template provided is set to 150dpi.  If the resolution on your camera does not support this, the resolution of the template can be reduced.  In Photoshop go Image > Image Size to determine the resolution of your photos.
Directions: Part 2
  1. Using people and/or objects as subject matter, shoot a variety of images that subtly reveals slight changes in angles and body movements.
  2. Rather than using a template, create a photomontage that is more random and free formed.  Shapes can vary in size and angles.  Shapes can also overlap for this study.  Borders do not have to be consistent.
​
Rubrics:
  1. Shoot original photos of people from slightly different angles.
  2. Photographs should have strong focus and proper lighting exposure. Each image used should first be color mangaged for strong contrast.
  3. Explore creative solutions to the visual challenge of combining multiple photos into a single expression. The final product(s) should suggest human movement and/or a variety of angle on a single frame.​
  4. Has completed 2 studies: (1) based on the grid (2) free formed.
Cubism 

Photomontage based on a grid system
Cubism influenced Photomontage by David Hockney

Picture
Photomontage based on deconstructive principles

New Photomontage Technique
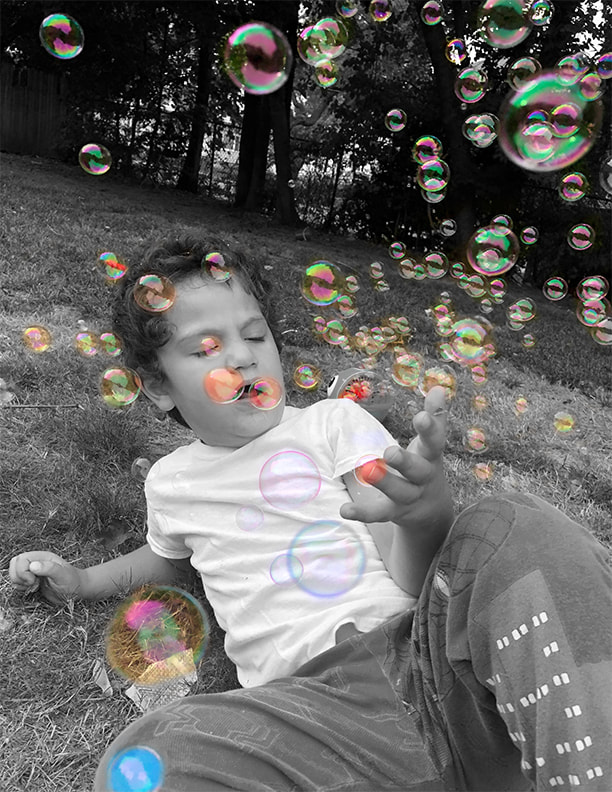
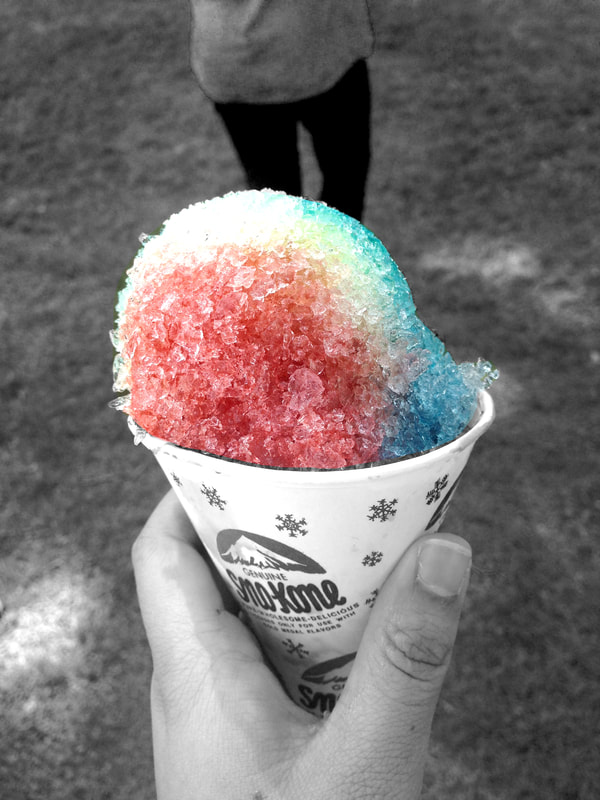
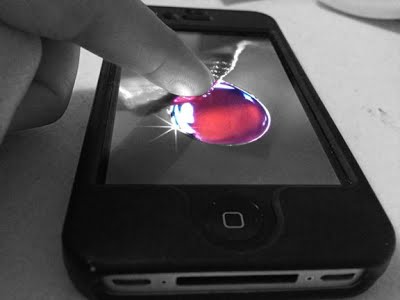
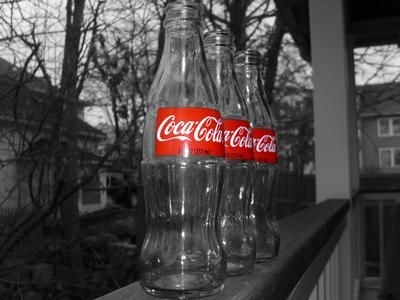
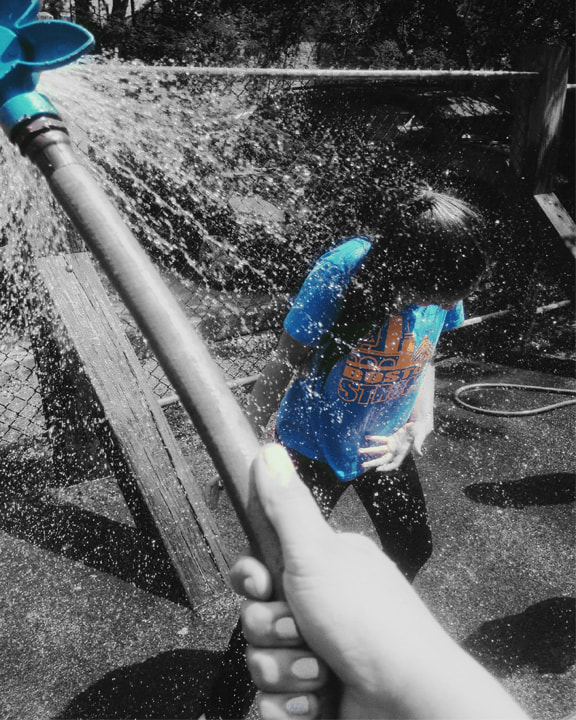
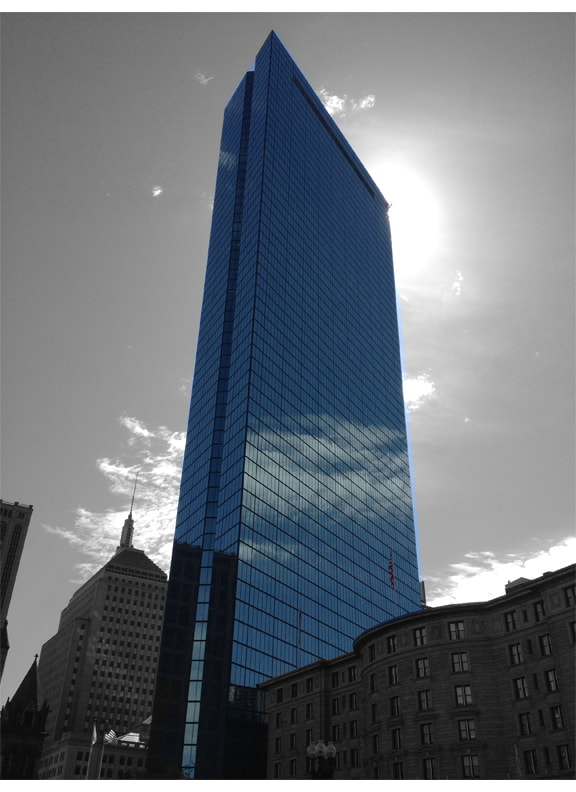
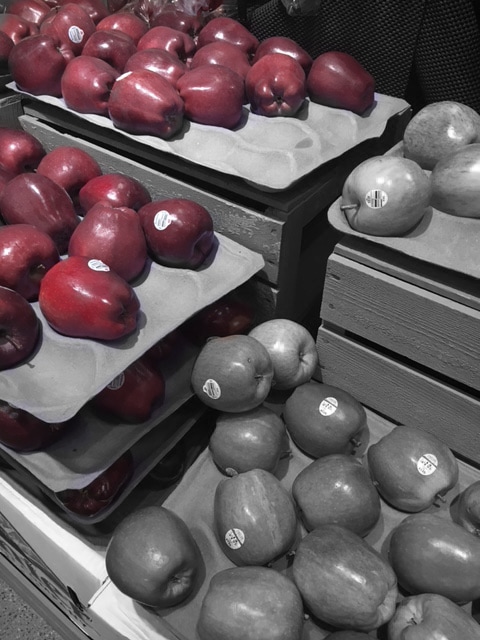
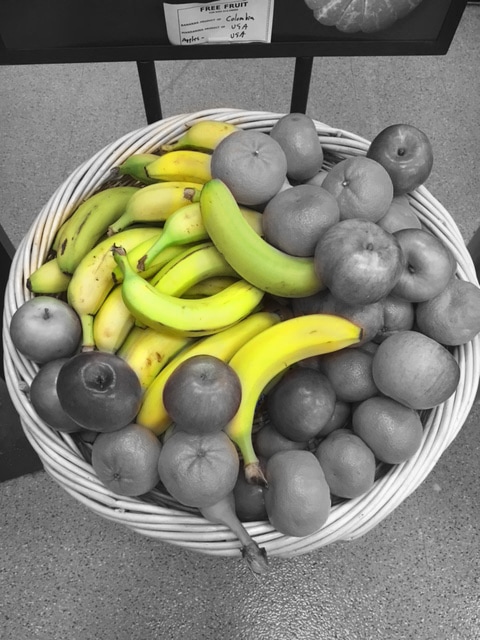
Picture
Directions:
  1. Open original photograph of landscape
  2. Create new document.  Size of document should represent the dimension of 1 square within landscape image.
  3. With new document go > Edit > Select All
  4. With new document go > Edit > Stroke (1 px - inside)
  5. With new document go > Edit Define Pattern (give pattern a name) After creating pattern close out new document. Do not save document.
  6. Create a new layer over landscape document.  Go Edit > Fill > Pattern > select custom pattern
  7. With new layer go > Image > Adjustment > Invert
  8. With new layer go > Layer Blending (located on layer pallet)  from Normal to Screen.
  9. Using the magic wand tool, select one grid at a time.  Make sure the new layer with the grid is selected first before you attempt to select it with the magic wand.  Once selected, highlight the layer with the landscape photo and go > command +C (to copy information), then go > command + V (to paste information)
  10. Repeat step 9 until each grid section has been copied and pasted.
  11. Change the opacity on each layer from step 9 to 80%. Give each of layers a drop shadow by double clicking on the layer and selecting drop shadow.
  12. Create a new layer in front of landscape layer, but under the copied and pasted layers.  Go Edit > Fill (fill document with white)
Picture
Picture
Picture

Pleasantville Effect

7/1/2016


Directions:

1. Produce a series of 6 quality images that share a common theme with your digital camera.  Images should contain high saturation of color. *Remember to always shoot your photos at the highest resolution.
2. Import images into Adobe Photoshop. Create a black & white adjustment layer.
3. Use your paintbrush to create openings in the adjustment layers to expose the colors from the original photo.
4. When the foreground color is black, you will be able to reveal color via the adjustment layer.  When the foreground color is white, the adjustment layer will re-generate itself hiding the once exposed bits of color.


Project Rubrics:

1. Produce 6 quality photographs that work within a common theme.
2. Photographs should show evidence of high color saturation.
3. Isolate and reveal small areas of color within black & white images.
4. Craft: Selections should be clean and deliberate.
Picture
Picture
Picture
Picture
Picture
<<Previous
Forward>>

Visual Art by Dan dressler

Contact Information

Dan R. Dressler
​Waltham, MA 02453
visualart@dandressler.com
  • Home
  • Memory On Display
  • My Work
    • Twilight Zone Series
    • Cell Phone Photo Memories
    • Home Decoration
    • Summer_2019
    • Beneath the Surface
    • Multi Media Collage
    • Photography
    • Mono Prints
  • Contact